Spring Boot/Mybatis/Dubbo/Druid整合

记录自己项目中使用Spring Boot与Mybatis/Dubbo/Druid整合过程中出现的问题,以及相应的解决方法.

Spring Boot部分

生成一个简单的Spring Boot项目

首先去Spring Boot的官网项目生成器生成一个简单项目:start.spring.io

点Generate Project下载并且导入到本地IDE, 这里用的是Intellij.

Spring Boot Pom文件修改默认继承关系及引用

默认Pom文件Spring Boot是用继承Pom的方式导入Spring Boot的必须组件的,那如果项目Pom中本来就已经有一个parent存在了,那应该怎么办呢? Spring Boot给出了自己的解决办法

1
2
3
4
5
6
7
8
9
10
11
12
<dependencyManagement>
<dependencies>
<dependency>
<!-- Import dependency management from Spring Boot -->
<groupId>org.springframework.boot</groupId>
<artifactId>spring-boot-dependencies</artifactId>
<version>2.0.0.RELEASE</version>
<type>pom</type>
<scope>import</scope>
</dependency>
</dependencies>
</dependencyManagement>

使用dependencyManagement代替parent完成Spring Boot必须组件的导入.

出现错误

项目中出现:

1
2
3
4
5
6
7
8
9
10
11
12
13
14
15
16
17
18
19
20
21
Caused by: java.lang.IllegalArgumentException: LoggerFactory is not a Logback LoggerContext but Logback is on the classpath. Either remove Logback or the competing implementation (class org.slf4j.log4j12.Log4jLoggerFactory loaded from file:/Users/MarsShen/Project/SSM/xmall/xmall-manager/xmall-manager-service-springboot/target/xmall-manager-service-springboot-0.0.1-SNAPSHOT/WEB-INF/lib/slf4j-log4j12-1.8.0-alpha2.jar). If you are using WebLogic you will need to add 'org.slf4j' to prefer-application-packages in WEB-INF/weblogic.xml: org.slf4j.log4j12.Log4jLoggerFactory
at org.springframework.util.Assert.instanceCheckFailed(Assert.java:637)
at org.springframework.util.Assert.isInstanceOf(Assert.java:537)
at org.springframework.boot.logging.logback.LogbackLoggingSystem.getLoggerContext(LogbackLoggingSystem.java:274)
at org.springframework.boot.logging.logback.LogbackLoggingSystem.beforeInitialize(LogbackLoggingSystem.java:99)
at org.springframework.boot.context.logging.LoggingApplicationListener.onApplicationStartingEvent(LoggingApplicationListener.java:191)
at org.springframework.boot.context.logging.LoggingApplicationListener.onApplicationEvent(LoggingApplicationListener.java:170)
at org.springframework.context.event.SimpleApplicationEventMulticaster.doInvokeListener(SimpleApplicationEventMulticaster.java:172)
at org.springframework.context.event.SimpleApplicationEventMulticaster.invokeListener(SimpleApplicationEventMulticaster.java:165)
at org.springframework.context.event.SimpleApplicationEventMulticaster.multicastEvent(SimpleApplicationEventMulticaster.java:139)
at org.springframework.context.event.SimpleApplicationEventMulticaster.multicastEvent(SimpleApplicationEventMulticaster.java:127)
at org.springframework.boot.context.event.EventPublishingRunListener.starting(EventPublishingRunListener.java:68)
at org.springframework.boot.SpringApplicationRunListeners.starting(SpringApplicationRunListeners.java:48)
at org.springframework.boot.SpringApplication.run(SpringApplication.java:313)
at org.springframework.boot.web.servlet.support.SpringBootServletInitializer.run(SpringBootServletInitializer.java:155)
at org.springframework.boot.web.servlet.support.SpringBootServletInitializer.createRootApplicationContext(SpringBootServletInitializer.java:135)
at org.springframework.boot.web.servlet.support.SpringBootServletInitializer.onStartup(SpringBootServletInitializer.java:87)
at org.springframework.web.SpringServletContainerInitializer.onStartup(SpringServletContainerInitializer.java:172)
at org.apache.catalina.core.StandardContext.startInternal(StandardContext.java:5196)
at org.apache.catalina.util.LifecycleBase.start(LifecycleBase.java:150)
... 43 more

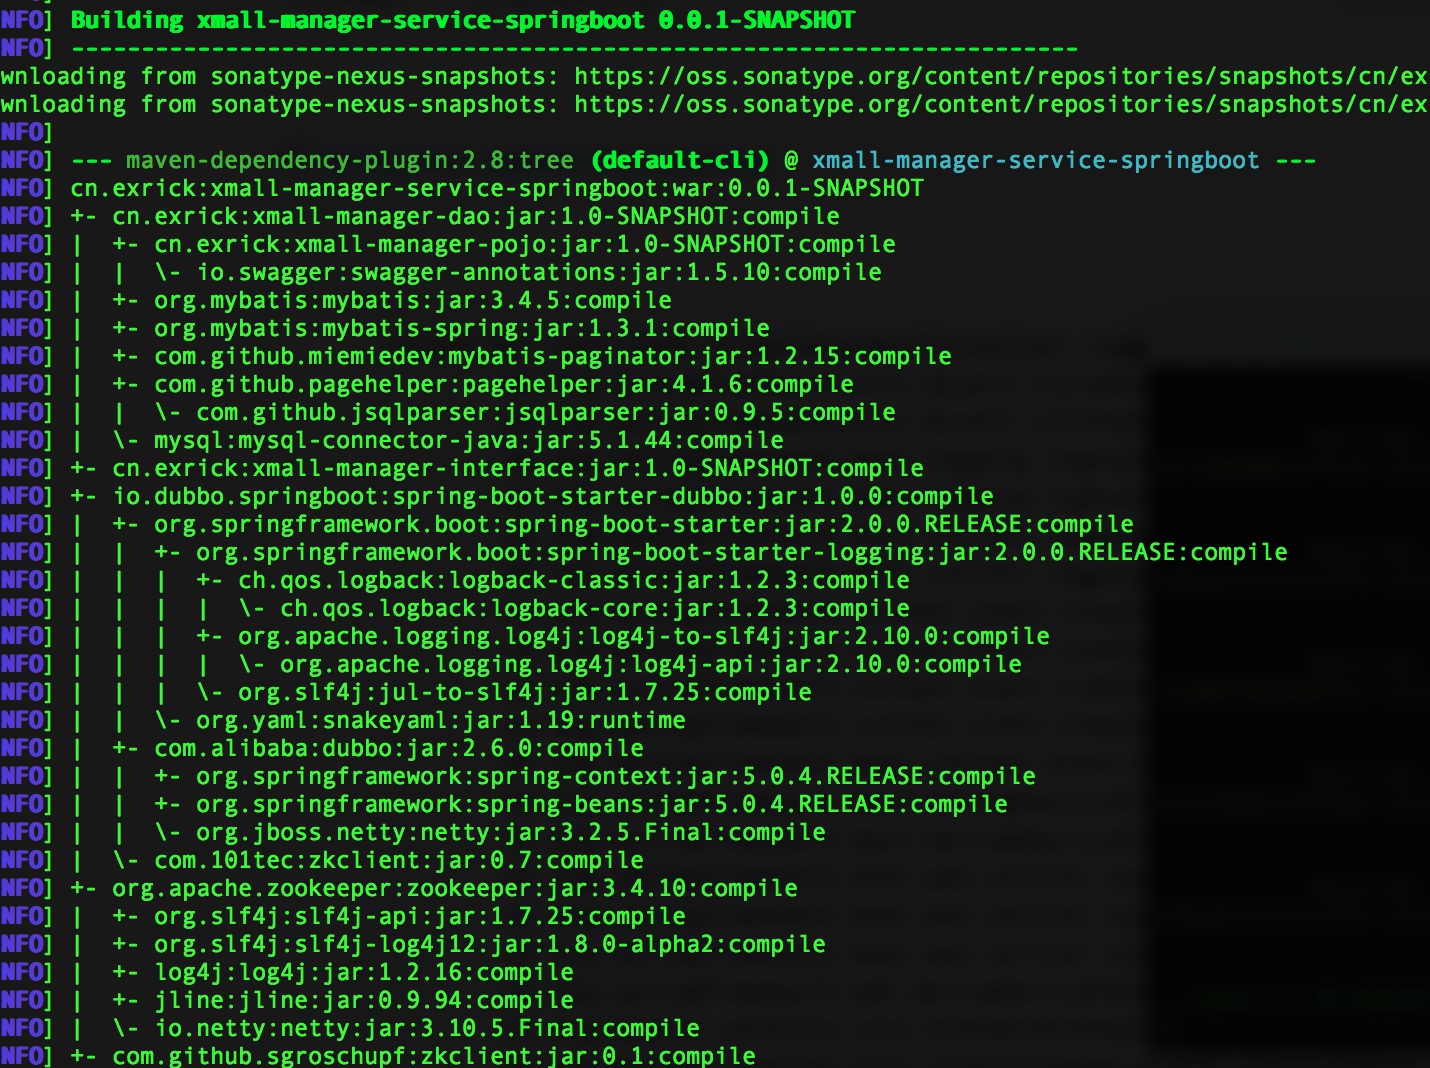
这是由于项目中已经存在log4j的jar包,与Logback产生冲突导致运行时出现这个java.lang.IllegalArgumentException: LoggerFactory is not a Logback LoggerContext but Logback is on the classpath.错误. 通过mvn dependency:tree命令可以看到具体冲突的文件

解决这个问题很简单, 只需要在Spring Boot组件导入的时候, 将有冲突的组件排除spring-boot-starter-logging再导入即可.

1
2
3
4
5
6
7
8
9
10
<dependency>
<groupId>org.springframework.boot</groupId>
<artifactId>spring-boot-starter-web</artifactId>
<exclusions>
<exclusion>
<groupId>org.springframework.boot</groupId>
<artifactId>spring-boot-starter-logging</artifactId>
</exclusion>
</exclusions>
</dependency>

Spring Boot与Dubbo整合

Spring Boot与Dubbo整合

Spring Boot与Dubbo整合相对比较简单, 首先在Pom文件中导入相应的jar包:

1
2
3
4
5
6
7
8
9
10
11
12
13
<dependency>
<groupId>io.dubbo.springboot</groupId>
<artifactId>spring-boot-starter-dubbo</artifactId>
<version>1.0.0</version>
</dependency>
<dependency>
<groupId>org.apache.zookeeper</groupId>
<artifactId>zookeeper</artifactId>
</dependency>
<dependency>
<groupId>com.github.sgroschupf</groupId>
<artifactId>zkclient</artifactId>
</dependency>

修改application.properties中的配置, 添加dubbo相关属性:

1
2
3
4
5
6
7
8
#Dubbo 服务提供者配置
#注册中心选择了zookeeper
spring.dubbo.registry.address=zookeeper://127.0.0.1:2181
spring.dubbo.protocol.name=dubbo
spring.dubbo.protocol.port=20880
spring.dubbo.application.name=provider
#需要暴露接口的包
spring.dubbo.scan=cn.example.servicespringboot.service.imp

最后在服务生产者类中使用com.alibaba.dubbo.config.annotation.Service中的@service即可暴露service

1
2
3
4
5
6
7
8
//...
import com.alibaba.dubbo.config.annotation.Service;
//...

@Service
public class MemberServiceImpl implements MemberService {
//...
}

Dubbo Admin的使用

Dubbo控制台可以很好的监控当前服务发布者与消费者的状态, 建议调试的时候安装使用.安装教程

Spring Boot与Mybatis/Druid整合

Spring Boot与Mybatis/Druid整合

首先在Pom文件中导入相应的jar包:

1
2
3
4
5
6
7
8
9
10
11
12
13
14
15
<dependency>
<groupId>org.mybatis.spring.boot</groupId>
<artifactId>mybatis-spring-boot-starter</artifactId>
<version>1.3.1</version>
</dependency>
<dependency>
<groupId>com.alibaba</groupId>
<artifactId>druid</artifactId>
<version>1.1.8</version>
</dependency>
<dependency>
<groupId>mysql</groupId>
<artifactId>mysql-connector-java</artifactId>
<version>5.1.44</version>
</dependency>

修改application.properties中的配置, 使用Druid链接数据库:

1
2
3
4
5
6
7
8
9
10
11
12
13
14
15
16
17
18
19
20
21
22
23
24
25
26
27
28
29
30
31
#数据库设置
spring.datasource.type=com.alibaba.druid.pool.DruidDataSource
spring.datasource.driverClassName=com.mysql.jdbc.Driver
spring.datasource.url=jdbc:mysql://localhost:3306/test?characterEncoding=utf-8
spring.datasource.username=root
spring.datasource.password=root
#--------------------------
# 下面为连接池的补充设置,应用到上面所有数据源中
# 初始化大小,最小,最大
spring.datasource.initialSize=5
spring.datasource.minIdle=5
spring.datasource.maxActive=20
# 配置获取连接等待超时的时间
spring.datasource.maxWait=60000
# 配置间隔多久才进行一次检测,检测需要关闭的空闲连接,单位是毫秒
spring.datasource.timeBetweenEvictionRunsMillis=60000
# 配置一个连接在池中最小生存的时间,单位是毫秒
spring.datasource.minEvictableIdleTimeMillis=300000
spring.datasource.validationQuery=SELECT 1 FROM DUAL
spring.datasource.testWhileIdle=true
spring.datasource.testOnBorrow=false
spring.datasource.testOnReturn=false
# 打开PSCache,并且指定每个连接上PSCache的大小
spring.datasource.poolPreparedStatements=true
spring.datasource.maxPoolPreparedStatementPerConnectionSize=20
# 配置监控统计拦截的filters,去掉后监控界面sql无法统计,'wall'用于防火墙
spring.datasource.filters=stat,wall,log4j
# 通过connectProperties属性来打开mergeSql功能;慢SQL记录
spring.datasource.connectionProperties=druid.stat.mergeSql=true;druid.stat.slowSqlMillis=5000
# 合并多个DruidDataSource的监控数据
#spring.datasource.useGlobalDataSourceStat=true

创建一个用DatasourceConfig类来配置Data source:

1
2
3
4
5
6
7
8
9
10
11
12
13
14
15
16
17
18
package cn.example.servicespringboot.config;

import com.alibaba.druid.pool.DruidDataSource;
import org.springframework.boot.context.properties.ConfigurationProperties;
import org.springframework.context.annotation.Bean;
import org.springframework.context.annotation.Configuration;

import javax.sql.DataSource;

@Configuration
public class DatasourceConfig {
@Bean
@ConfigurationProperties(prefix = "spring.datasource")
public DataSource druidDataSource() {
DruidDataSource druidDataSource = new DruidDataSource();
return druidDataSource;
}
}

在启动类中加入@ServletComponentScan@MapperScan("cn.example.manager.mapper"):定义mapper所在的包

1
2
3
4
5
6
@SpringBootApplication
@ServletComponentScan
@MapperScan("cn.example.manager.mapper")
public class ServiceSpringbootApplication {
//...
}

至此, 整个整合基本就配置完成.